
Gültig für
| GridVis-Editionen | Software-Plattform |
|---|---|
|
|

Absichern der Datenübertragung zwischen GridVis-Dienst und Webbrowser
Die Datenübertragung zwischen dem GridVis-Dienst und dem Webbrowser kann über ein SSL-Zertifikat verschlüsselt werden. Das Zertifikat muss im p12- oder pfx-Format vorliegen. Wenden Sie sich ggf. an Ihre IT-Abteilung.
Aktivieren der Verschlüsselung
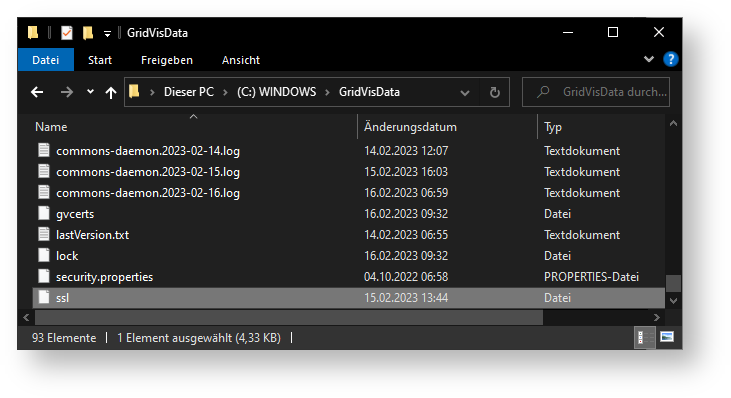
Kopieren Sie die Zertifikatsdatei in das Konfigurationsverzeichnis des GridVis-Diensts. Standardmäßig ist dieses Verzeichnis C:\GridVisData.
Benennen Sie die Datei in ssl um. Beachten Sie, dass die Datei keine Dateiendung haben darf.
- Starten Sie den GridVis-Dienst neu.
- Falls das Zertifikat nicht passwortgeschützt ist, ist der GridVis-Dienst jetzt nur über eine HTTPS-Verbindung im Webbrowser erreichbar. Beispiel:
http://[Webadresse]:8080 ist nicht mehr erreichbar.
https://[Webadresse]:8080 ist erreichbar und zeigt die gewohnte Startseite des GridVis-Diensts.
[Webadresse] entspricht der Webadresse Ihres GridVis-Diensts.
Hinweis
Nach Aktivierung der Verschlüsselung ist der GridVis-Dienst im Webbrowser nur noch über die im Zertifikat spezifizierte Webadresse erreichbar. Die Verwendung von Wildcards ist zulässig.
Falls das Zertifikat passwortgeschützt ist, muss das Passwort im GridVis-Dienst hinterlegt werden, bevor der Webbrowser eine HTTPS-Verbindung aufbauen kann. Gehen Sie dazu wie folgt vor:
- Öffnen Sie die Weboberfläche des GridVis-Dienst wie gewohnt über eine HTTP-Verbindung.
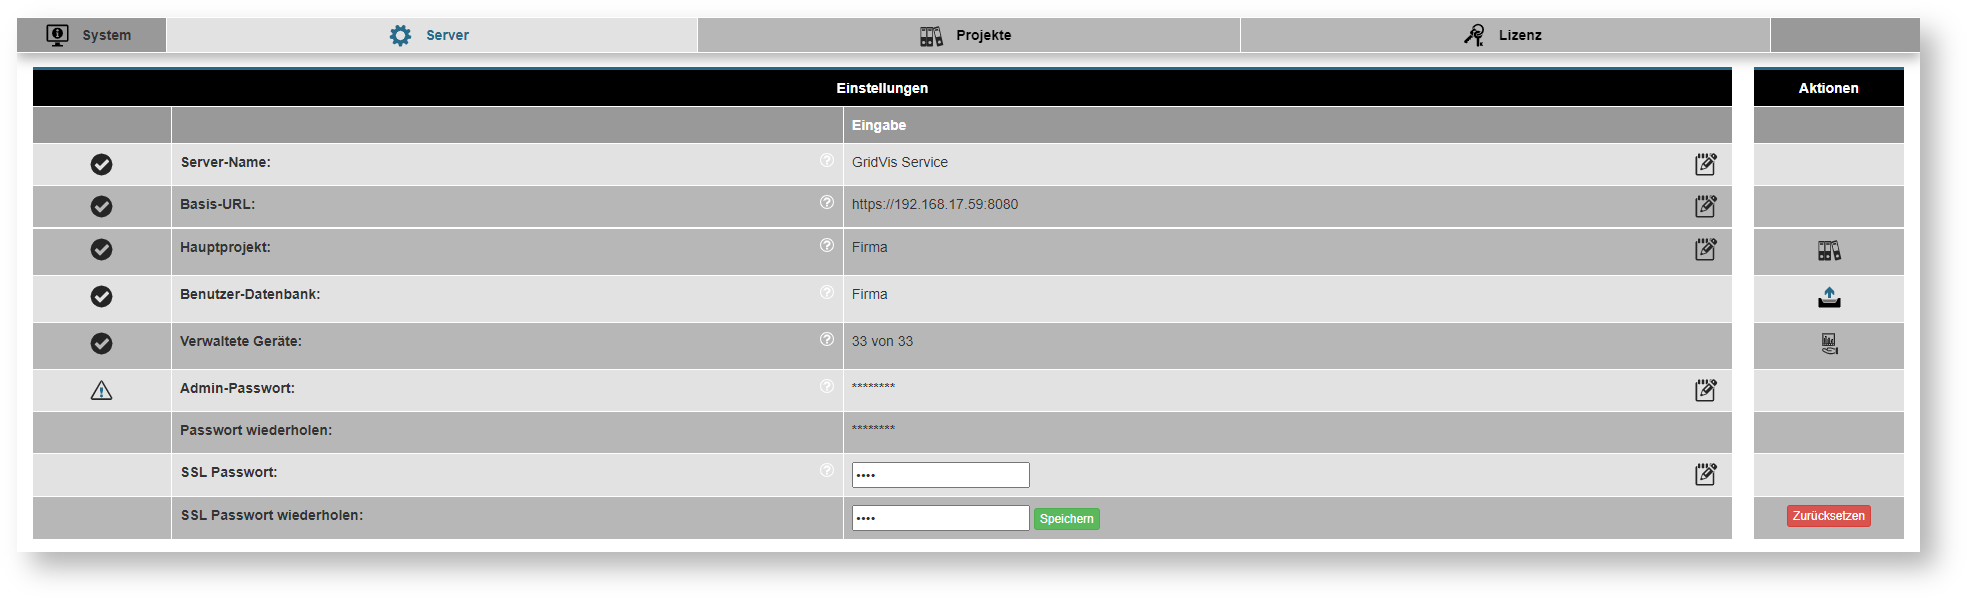
- Wechseln Sie zur Server-Konfiguration. Diese finden Sie unter Einstellungen > System.
- Geben Sie das Zertifikats-Passwort unter SSL-Passwort ein und wiederholen Sie das Passwort. Stimmen beide Eingaben überein, wird die Speichern-Schaltfläche grün.
- Bestätigen Sie das Passwort mit der Speichern-Schaltfläche. Der GridVis-Dienst wird neu gestartet.
- Stimmt das Passwort mit dem Passwort des Zertifikats überein, ist der GridVis-Dienst nur über eine HTTPS-Verbindung im Webbrowser erreichbar. Stimmen die Passwörter nicht überein, ist der GridVis-Dienst nur über eine HTTP-Verbindung erreichbar.
Deaktivieren der Verschlüsselung
- Entfernen Sie die Zertifikatsdatei aus dem Konfigurationsverzeichnis des GridVis-Diensts.
- Entfernen Sie ggf. das SSL-Passwort in der Server-Konfiguration mit der roten Zurücksetzen-Schaltfläche.
- Starten Sie den GridVis-Dienst neu.
- Der GridVis-Dienst ist jetzt nur über eine HTTP-Verbindung im Webbrowser erreichbar.
Einrichten einer Verbindung zu einem Proxy-Server
Für die Verbindung zwischen der GridVis und einem Proxy-Server müssen die Proxy-Einstellungen sowohl in der GridVis-Desktop als auch im GridVis-Dienst hinterlegt werden. Wenden Sie sich ggf. an Ihre IT-Abteilung.
Proxy-Einstellungen in der GridVis-Desktop hinterlegen
- Öffnen Sie die Einstellungen der GridVis-Desktop unter Extras > Optionen.
- Wechseln Sie zum Reiter Allgemein.
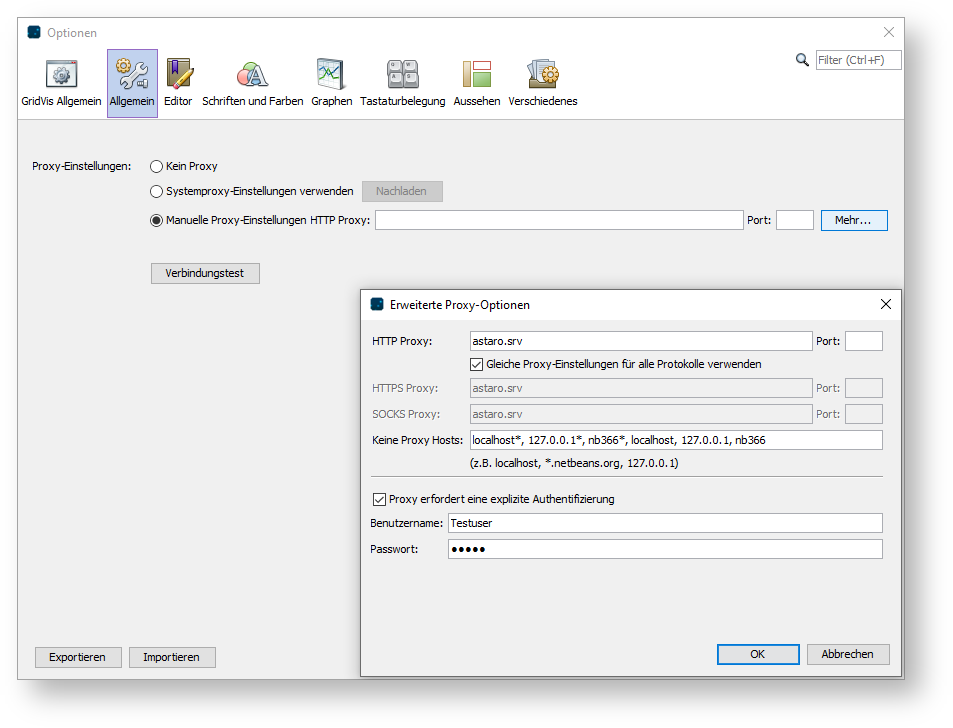
- Wählen Sie die manuellen Proxy-Einstellungen aus und öffnen Sie die erweiterten Proxy-Optionen mit der Schaltfläche Mehr.
- Geben Sie die Proxy-Einstellungen ein und bestätigen Sie diese.
- Die GridVis-Desktop kann jetzt die Verbindung zum Proxy-Server herstellen.
Proxy-Einstellungen in der GridVis-Desktop entfernen
- Öffnen Sie die Einstellungen der GridVis-Desktop unter Extras > Optionen.
- Wechseln Sie zum Reiter Allgemein.
- Entfernen Sie alle Einträge der manuellen Proxy-Einstellungen.
- Wählen Sie Kein Proxy oder Systemproxy-Einstellungen verwenden aus. Diese Auswahl ist abhängig von Ihrem IT-System. Wenden Sie sich ggf. an Ihre IT-Abteilung. Bestätigen Sie die Auswahl.
- Die GridVis-Desktop verwendet jetzt keine eigenen Proxy-Einstellungen mehr.
Proxy-Einstellungen im GridVis-Dienst hinterlegen
Um Proxy-Einstellungen im GridVis-Dienst zu hinterlegen, müssen diese Einstellungen zuerst in der GridVis-Desktop hinterlegt werden.
- Öffnen Sie das Konfigurationsverzeichnis der GridVis-Desktop. Standardmäßig ist dieses Verzeichnis %appdata%\gridvis.
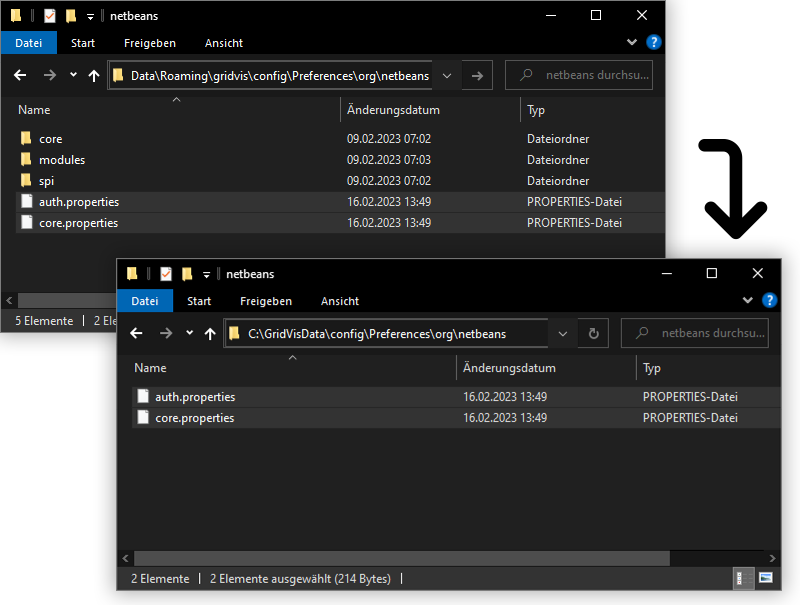
- Navigieren Sie in der Ordnerstruktur zu config\Preferences\org\netbeans.
- Kopieren Sie die beiden Dateien auth.properties und core.properties. Diese enthalten die Proxy-Einstellungen.
- Öffnen Sie das Konfigurationsverzeichnis des GridVis-Diensts. Standardmäßig ist dieses Verzeichnis C:\GridVisData.
- Navigieren Sie in der Ordnerstruktur zu config\Preferences\org\netbeans. Ggf. müssen Sie die Ordner org und netbeans manuell anlegen.
- Fügen Sie die Dateien auth.properties und core.properties ein.
- Starten Sie den GridVis-Dienst neu.
- Der GridVis-Dienst kann jetzt die Verbindung zum Proxy-Server herstellen.
Proxy-Einstellungen im GridVis-Dienst entfernen
- Öffnen Sie das Konfigurationsverzeichnis des GridVis-Diensts und navigieren Sie zu den Konfigurationsdateien mit den Proxy-Einstellungen. Standardmäßig befinden sich diese Dateien unter C:\GridVisData\config\Preferences\org\netbeans.
- Entfernen Sie die Dateien auth.properties und core.properties.
- Starten Sie den GridVis-Dienst neu.
- Der GridVis-Dienst verwendet jetzt keine eigenen Proxy-Einstellungen mehr.