
| Sv translation | ||||||||||||||||||||||||||||||||||||||||||||||||||||||||||||||||||||||||||||||||||||
|---|---|---|---|---|---|---|---|---|---|---|---|---|---|---|---|---|---|---|---|---|---|---|---|---|---|---|---|---|---|---|---|---|---|---|---|---|---|---|---|---|---|---|---|---|---|---|---|---|---|---|---|---|---|---|---|---|---|---|---|---|---|---|---|---|---|---|---|---|---|---|---|---|---|---|---|---|---|---|---|---|---|---|---|---|
| ||||||||||||||||||||||||||||||||||||||||||||||||||||||||||||||||||||||||||||||||||||
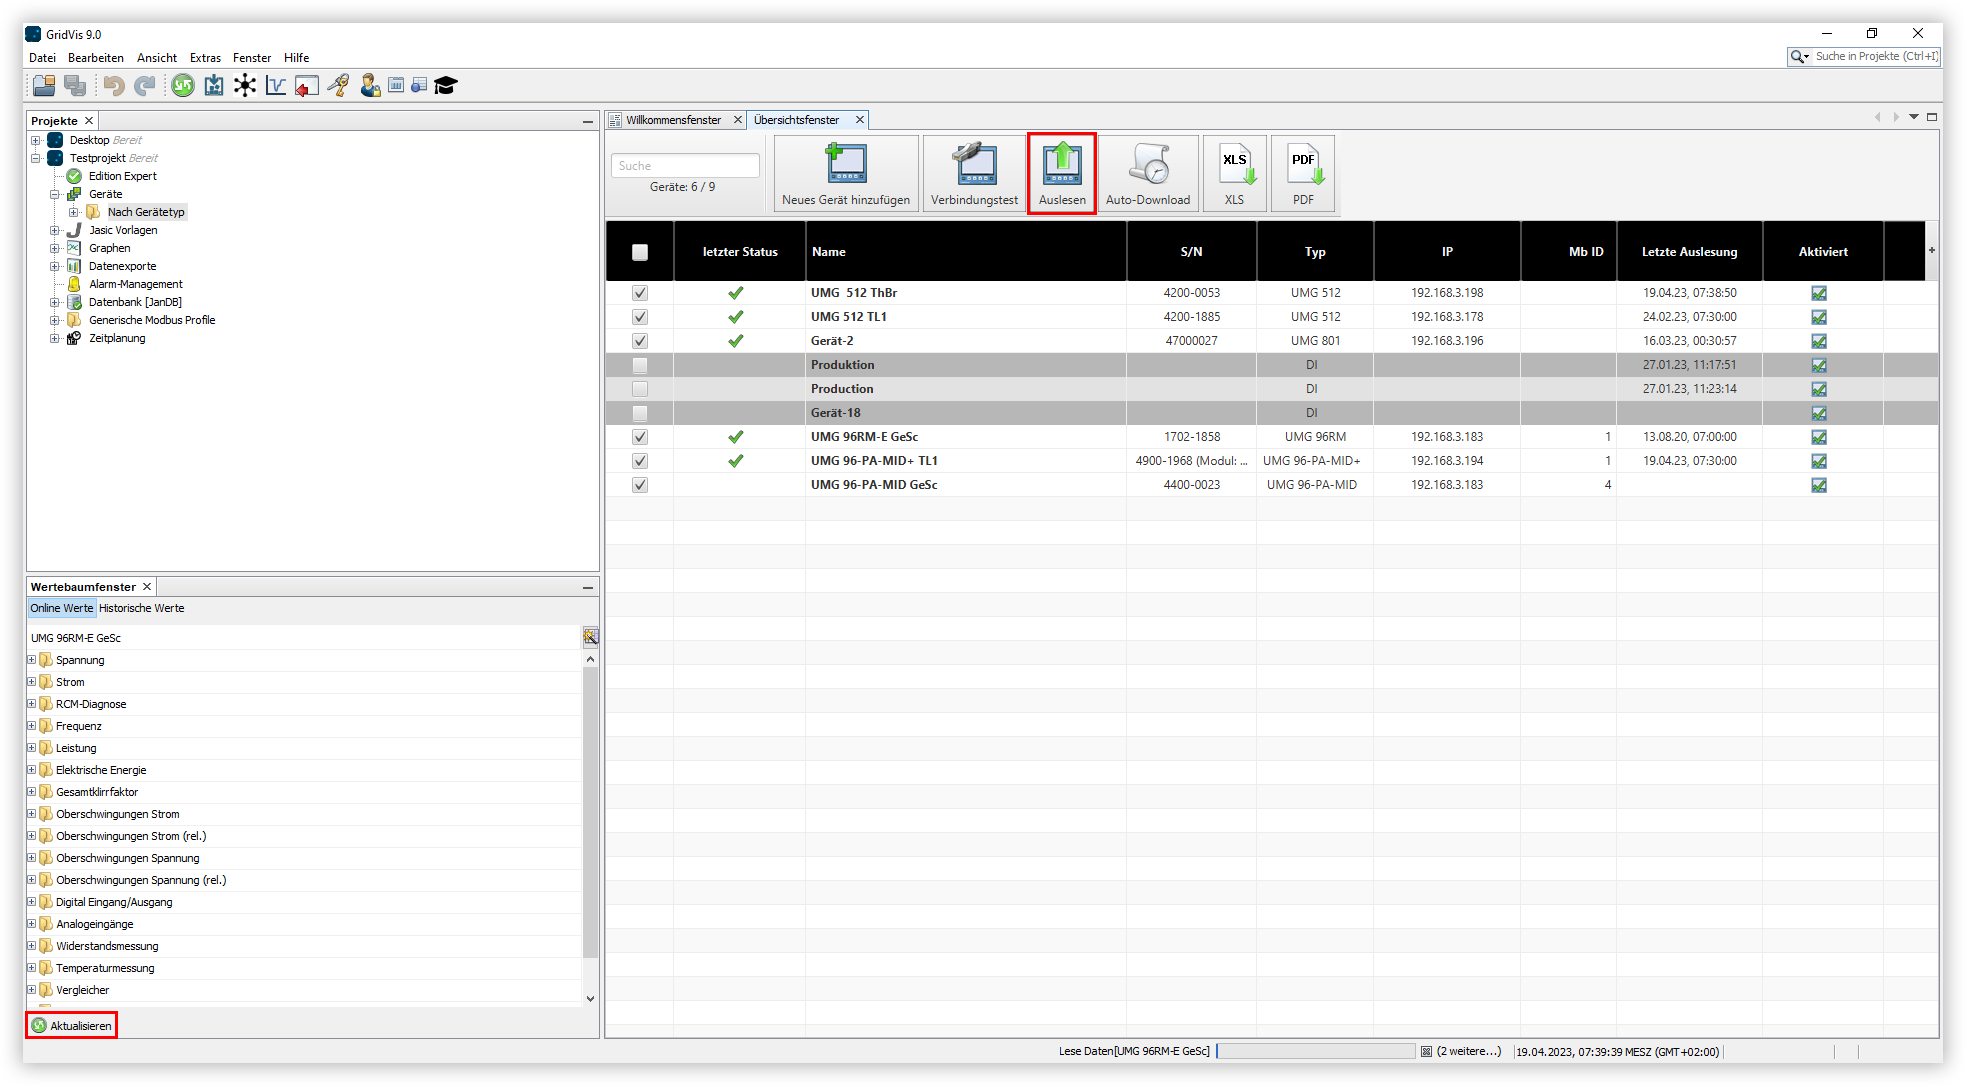
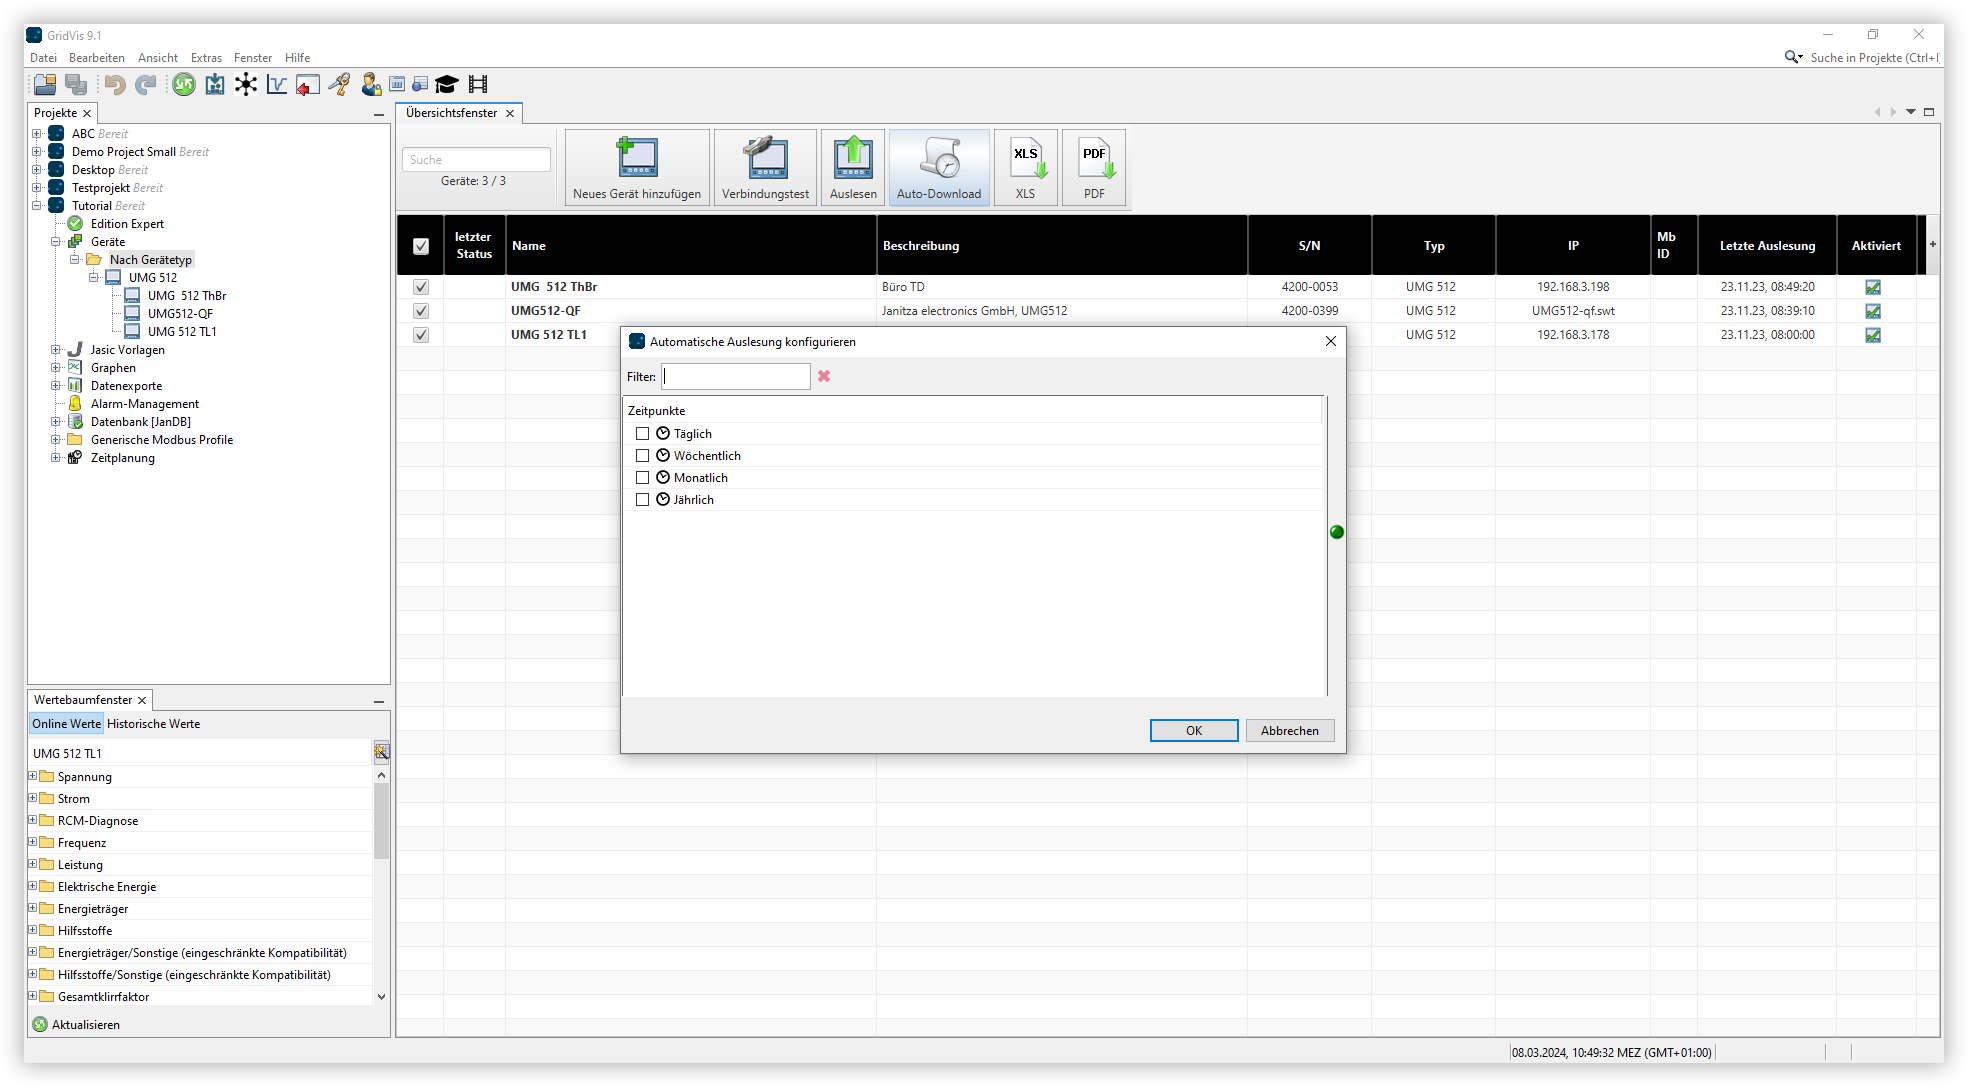
Geräte automatisch auslesenDie Messdaten Ihrer Geräte können auch automatisch zu einem bestimmten Zeitpunkt ausgelesen werden. Um ein automatisches Auslesen einzurichten, gehen Sie wie folgt vor:
|

| Sv translation | ||||||||||||||||||||||||||||||||||||||||||||||||||||||||||||||||||||||||||||||||||||
|---|---|---|---|---|---|---|---|---|---|---|---|---|---|---|---|---|---|---|---|---|---|---|---|---|---|---|---|---|---|---|---|---|---|---|---|---|---|---|---|---|---|---|---|---|---|---|---|---|---|---|---|---|---|---|---|---|---|---|---|---|---|---|---|---|---|---|---|---|---|---|---|---|---|---|---|---|---|---|---|---|---|---|---|---|
| ||||||||||||||||||||||||||||||||||||||||||||||||||||||||||||||||||||||||||||||||||||
Synchronize devices automaticallyThe measurement data of your devices can also be read out automatically at a specific time. To set up an automatic readout, proceed as follows:
|


| Sv translation | ||||||||||||||||||||
|---|---|---|---|---|---|---|---|---|---|---|---|---|---|---|---|---|---|---|---|---|
| ||||||||||||||||||||
Lectura automática de dispositivosLos datos de medición de sus aparatos también pueden leerse automáticamente en un momento determinado. Para configurar una lectura automática, proceda del siguiente modo:
|
| Sv translation | ||||||||||||||||||||
|---|---|---|---|---|---|---|---|---|---|---|---|---|---|---|---|---|---|---|---|---|
| ||||||||||||||||||||
Lettura automatica dei dispositiviI dati di misura dei dispositivi possono anche essere letti automaticamente in un momento specifico. Per impostare una lettura automatica, procedere come segue:
|