Versionen im Vergleich

Schlüssel

  • Diese Zeile wurde hinzugefügt.
  • Diese Zeile wurde entfernt.
  • Formatierung wurde geändert.
Kommentar: Mittels Scroll Versions veröffentlicht aus dem Bereich GVH und Version 1.0.
Sv translation
languagede

Inhalt
maxLevel2
minLevel2
indent0px

Gültig für

GridVis-Editionen

Software-Plattform


Scroll Ignore
scroll-viewporttrue
scroll-pdftrue
scroll-officetrue
scroll-chmtrue
scroll-docbooktrue
scroll-eclipsehelptrue
scroll-epubtrue
scroll-htmltrue
Layout-Box
floatingleft
Linchpin Teaser
iconlinchpin-teaser-icon-play-circle
varianticon
width150px
aligncenter
titleTUTORIAL
type6
newTabtrue
urlhttps://youtu.be/rekRSzStvq0
height150px


Scroll Only
scroll-viewporttrue
scroll-pdftrue
scroll-officetrue
scroll-chmtrue
scroll-docbooktrue
scroll-eclipsehelptrue
scroll-epubtrue
scroll-htmltrue


Beschreibung

Dashboards können über einen Link freigegeben und z. B. in einem Intranet veröffentlicht werden. Damit sind sie für Nutzer ohne GridVis-Login zugänglich. 

Info
titleHinweis
  • Wenn ein eingeloggter GridVis-Benutzer einen freigegebenen Dashboardlink öffnet, wird das Dashboard in der Ansicht des Benutzers angezeigt.
  • Von einem freigegebenen Dashboard können Sie nicht auf folgende Elemente verlinken:

Dashboard freigeben

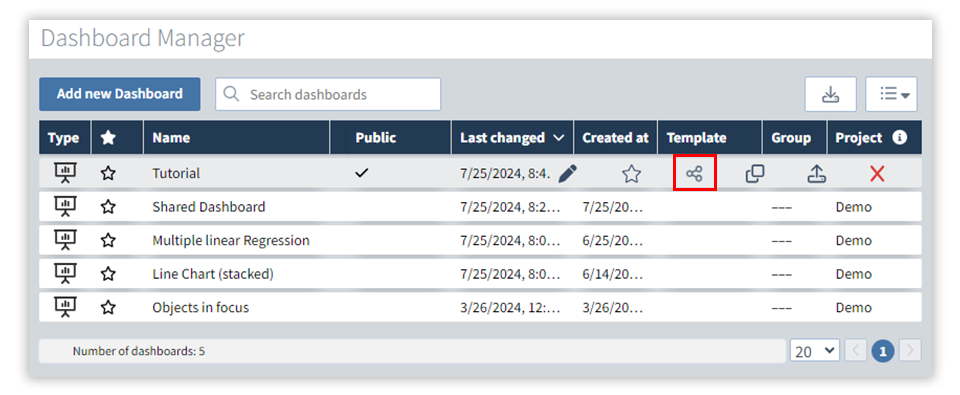
Abb. 1: Dashboard freigeben in der Dashboardverwaltung

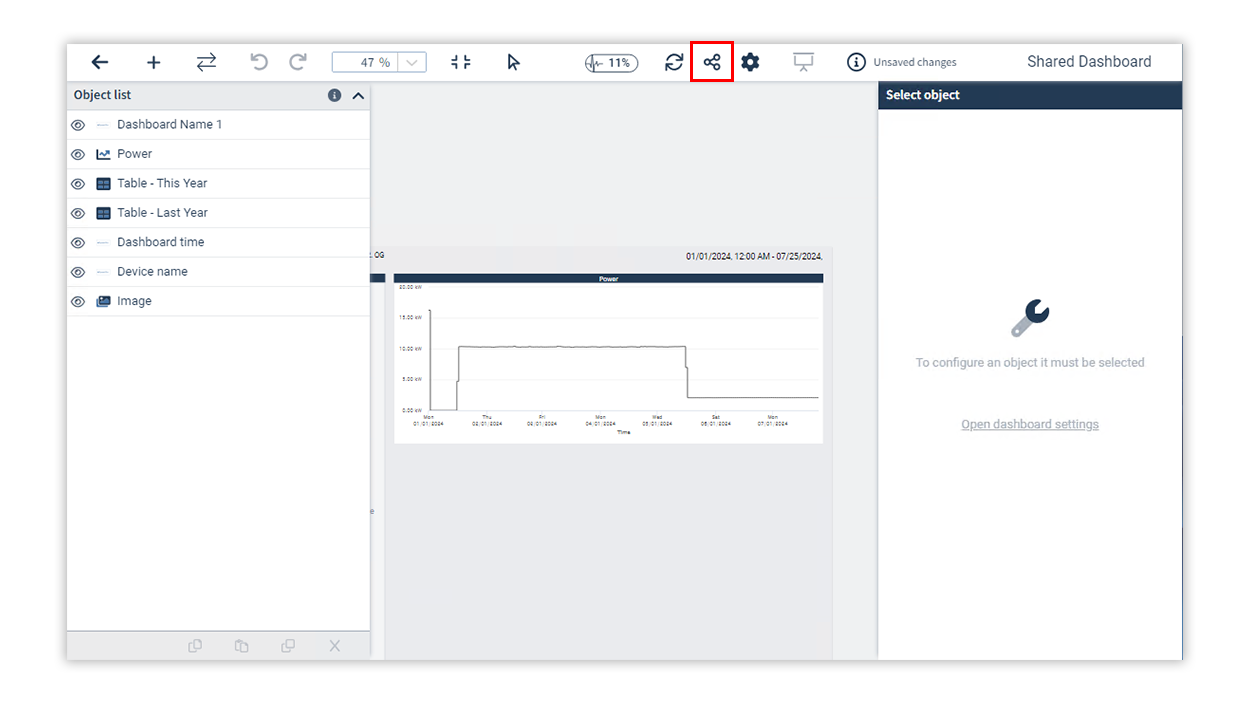
Abb. 2: Dashboard freigeben im Dashboardeditor
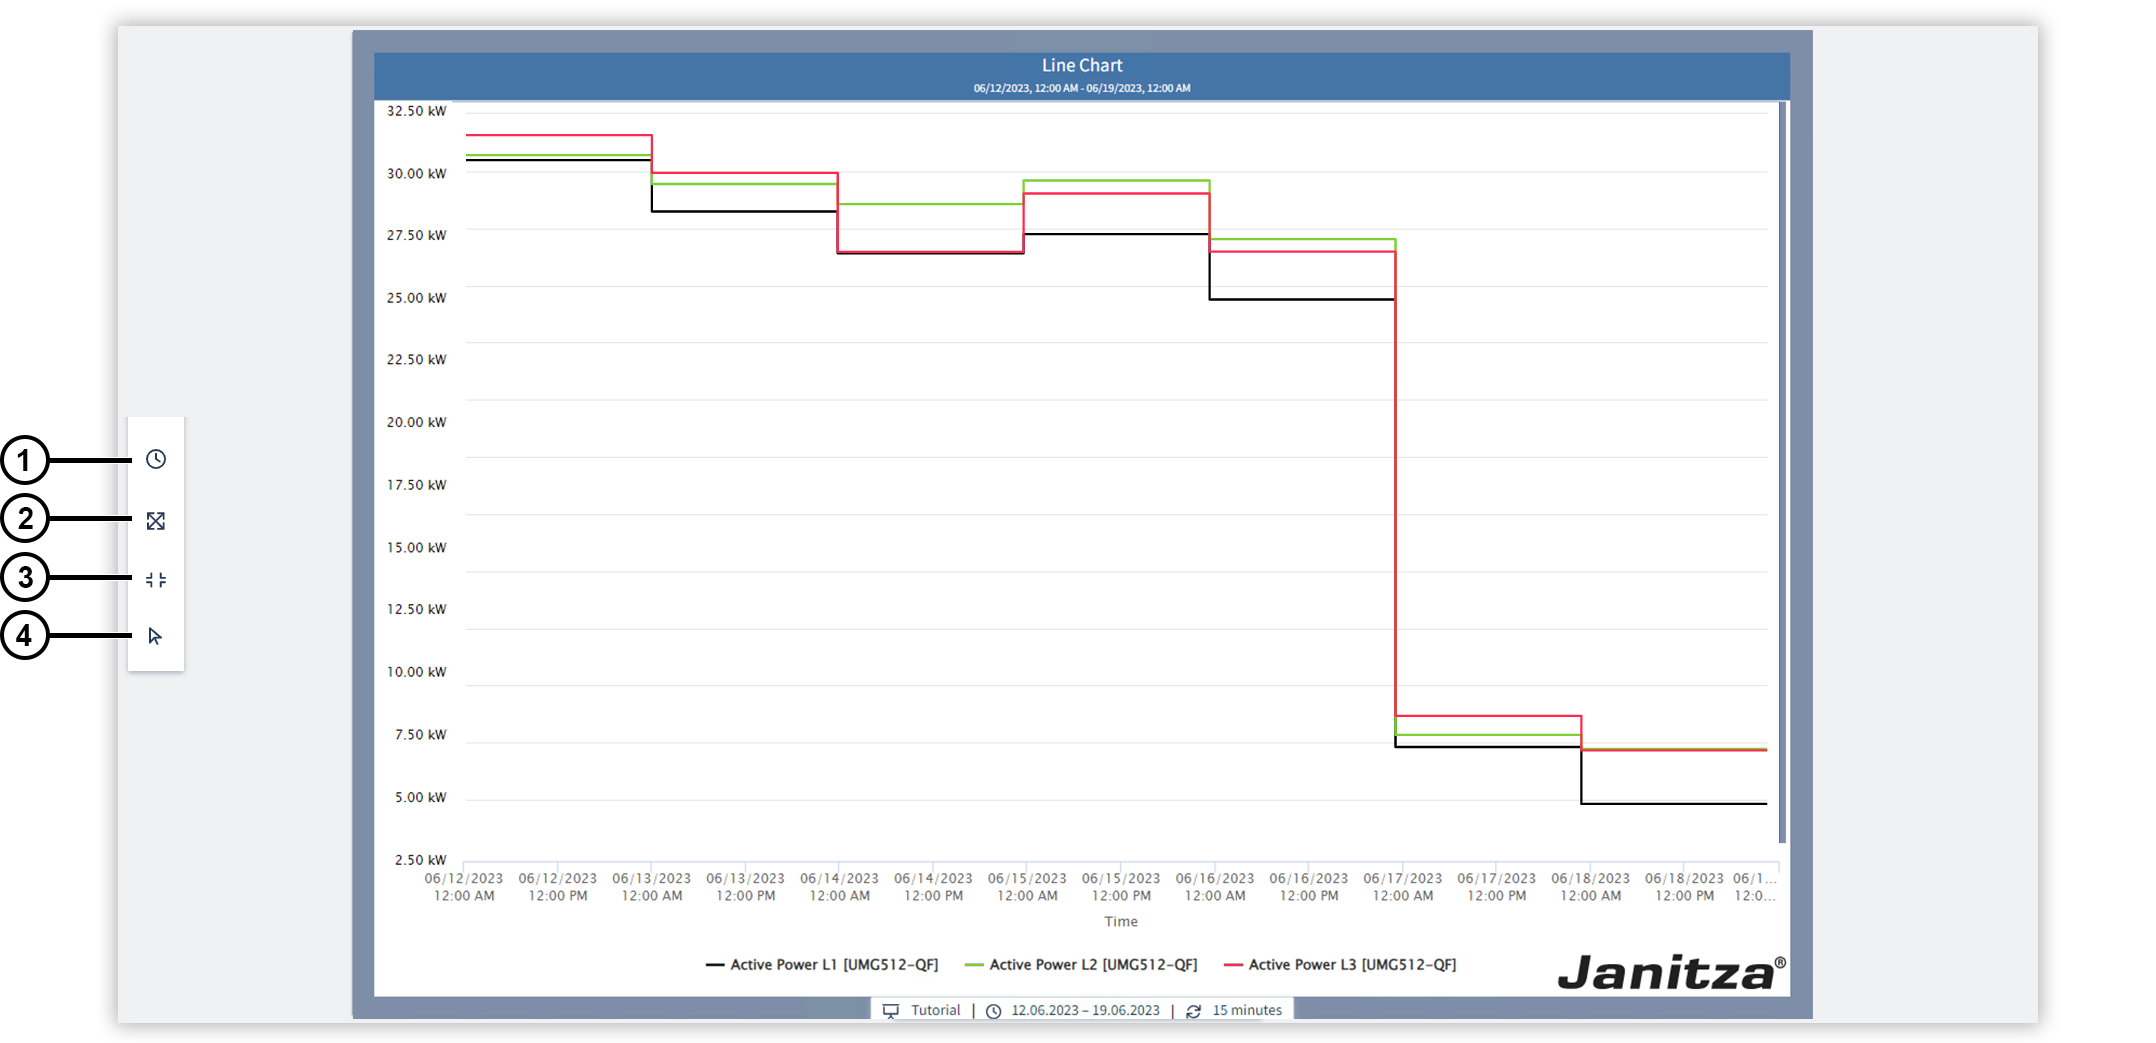


  1. Klicken Sie in der Zeile eines Dashboards in der Dashboardverwaltung (Abb. 1)oder in der Toolbar des Dashboardeditors (Abb. 2)auf das Icon Dashboard freigeben.
  2. Im Fenster Dashboard öffentlich freigeben wählen Sie die Option "(Name des Dashboards)" öffentlich freigeben.
  3. Kopieren Sie den darunter angezeigten Link um diesen zu teilen und klicken Sie auf Bestätigen. Der Link ist statisch und ändert sich nicht, wenn die Freigabe widerrufen und erneut erteilt wird.
  4. In der Spalte Freigabe erscheint ein Haken. Das Dashboard ist freigegeben.


Freigegebenes Dashboard anzeigen

Über einen freigegebenen Dashboardlink können Sie ein Dashboard ohne GridVis-Login im Präsentationsmodus anzeigen.

PositionBeschreibung
1Ändert die Zeiteinstellung. Während der Präsentation des Dashboards können Sie die Einstellungen der angezeigten Zeit ändern. Diese Änderung gilt für die Dauer der Präsentation für alle Objekte des Dashboards. In den Objekteinstellungen können Sie einzelne Objekte von einer Änderung der angezeigten Zeit ausnehmen.
2Zeigt das Dashboard im Vollbild-Modusan.
3Passt das Dashboard an die Fenstergröße an, sodass es den Anzeigebereich vollständig ausfüllt.
4Schaltet den Panning Modus um. Das Maussymbol zeigt an, dass Sie mit den Objekten auf dem Dashboard interagieren. Das Handsymbol bedeutet, dass Sie im Präsentationsmodus navigieren.


Sv translation
languageen

Inhalt
maxLevel2
minLevel2
indent0px

Valid for

GridVis editions

Software platform


Scroll Ignore
scroll-viewporttrue
scroll-pdftrue
scroll-officetrue
scroll-chmtrue
scroll-docbooktrue
scroll-eclipsehelptrue
scroll-epubtrue
scroll-htmltrue
Layout-Box
floatingleft
Linchpin Teaser
iconlinchpin-teaser-icon-play-circle
varianticon
width150px
aligncenter
titleTUTORIAL
type6
newTabtrue
urlhttps://youtu.be/HB-EfqELZwA
height150px


Scroll Only
scroll-viewporttrue
scroll-pdftrue
scroll-officetrue
scroll-chmtrue
scroll-docbooktrue
scroll-eclipsehelptrue
scroll-epubtrue
scroll-htmltrue


Description

Dashboards can be shared via a link and, for example, be published on an Intranet. This makes them accessible to users without a GridVis login. 

Info
titleNote
  • When a logged-in GridVis user opens a shared dashboard link, the dashboard is displayed in the user's view.
  • You cannot link to the following elements from a shared dashboard:

Share dashboard

Fig. 1: Share dashboard in the Dashboard management

Fig. 2: Share dashboard in the Dashboard editor


  1. In the Dashboard Manager (Fig. 1)or in the toolbar of the Dashboard editor (Fig. 2),click on the icon Share dashboard in the row of a dashboard.
  2. In the window Share dashboard publicly, select the option "(Name of the dashboard)" share publicly.
  3. Copy the link that is displayed below this to share it and click on Submit. The link is static and does not change if the share is revoked and granted again.
  4. A check mark appears in the column Public. The dashboard has been shared.


Show shared dashboard

You can use a shared dashboard link to display a dashboard in presentation mode without a GridVis login.

PositionDescription
1Changes the time setting. During the dashboard presentation you can change the settings of the displayed time. This change applies to all objects in the dashboard for the duration of the presentation. In the object settings, you can exclude individual objects from having the displayed time changed.
2

Displays the dashboard in full screenmode.

3

Adjusts the dashboard to the window size so that it completely fills the display area.

4Switches the panning mode. The mouse icon indicates that you are interacting with the objects on the Dashboard. The hand icon means that you are navigating in presentation mode.


Sv translation
languageit

Inhalt
maxLevel2
minLevel2
indent0px

Valido per

Edizioni GridVis

Piattaforma software


Scroll Ignore
scroll-viewporttrue
scroll-pdftrue
scroll-officetrue
scroll-chmtrue
scroll-docbooktrue
scroll-eclipsehelptrue
scroll-epubtrue
scroll-htmltrue
Layout-Box
floatingleft
Linchpin Teaser
iconlinchpin-teaser-icon-play-circle
varianticon
width150px
aligncenter
titleTUTORIAL
type6
newTabtrue
urlhttps://youtu.be/HB-EfqELZwA
height150px


Scroll Only
scroll-viewporttrue
scroll-pdftrue
scroll-officetrue
scroll-chmtrue
scroll-docbooktrue
scroll-eclipsehelptrue
scroll-epubtrue
scroll-htmltrue


Descrizione

Le dashboard possono essere condivise tramite un link e pubblicate, ad esempio su una intranet. In questo modo sono accessibili anche agli utenti che non possiedono credenziali di accesso a GridVis. 

Info
titleNota
  • Quando un utente che ha effettuato l’accesso a GridVis apre un link a una dashboard condivisa, la dashboard viene visualizzata nella vista dell'utente.
  • Non è possibile collegarsi ai seguenti elementi da una dashboard condivisa:

Condividere la dashboard

Fig. 1: Condivisione di una dashboard in Gestione dashboard

Fig. 2: Condivisione di una dashboard nell'editor di dashboard


  1. Fare clic sulla riga di una dashboard in Gestione dashboard (Fig. 1)o nella toolbar dell’Editor di dashboard (Fig. 2)sull’icona Condividere la dashboard.
  2. Nella finestra Rendere pubblica la dashboard selezionare l'opzione Rendere pubblica "(Nome della dashboard)".
  3. Copiare il link visualizzato di seguito per condividerlo e fare clic su Confermare. Il link è statico e non cambia se l'autorizzazione viene revocata e concessa nuovamente.
  4. Nella colonna Condivisione viene visualizzato un segno di spunta. La dashboard è condivisa.


Visualizzazione di una dashboard condivisa

È possibile utilizzare un collegamento a una dashboard condivisa per visualizzare una dashboard in modalità di presentazione senza effettuare l'accesso a GridVis.

PosizioneDescrizione
1

Modifica l’impostazione dell’ora. Durante la presentazione della dashboard, è possibile modificare le impostazioni dell'ora visualizzata. Questa modifica si applica a tutti gli oggetti della Dashboard per tutta la durata della presentazione. Nelle impostazioni degli oggetti è possibile escludere singoli oggetti dalla modifica dell'ora visualizzata.

2

Mostra la dashboard a schermo intero.

3

Adatta la dashboard alle dimensioni della finestra, in modo da riempire completamente l’area di visualizzazione.

4

Cambia la modalità di panoramica. L'icona del mouse indica che si sta interagendo con gli oggetti della Dashboard. Il simbolo della mano indica che si sta navigando in modalità presentazione.


Sv translation
languagees

Inhalt
maxLevel2
minLevel2
indent0px

Válido para

Ediciones de GridVis

Plataforma de software


Scroll Ignore
scroll-viewporttrue
scroll-pdftrue
scroll-officetrue
scroll-chmtrue
scroll-docbooktrue
scroll-eclipsehelptrue
scroll-epubtrue
scroll-htmltrue
Layout-Box
floatingleft
Linchpin Teaser
iconlinchpin-teaser-icon-play-circle
varianticon
width150px
aligncenter
titleTUTORIAL
type6
newTabtrue
urlhttps://youtu.be/HB-EfqELZwA
height150px


Scroll Only
scroll-viewporttrue
scroll-pdftrue
scroll-officetrue
scroll-chmtrue
scroll-docbooktrue
scroll-eclipsehelptrue
scroll-epubtrue
scroll-htmltrue


Descripción

Los paneles pueden compartirse a través de un enlace y, p. ej., publicarse en una intranet. Así estarán accesibles para usuarios que no hayan iniciado sesión en GridVis. 

Info
titleNota
  • Si un usuario que ha iniciado sesión en GridVis abre un enlace a un panel compartido, el panel es mostrado en la vista del usuario.
  • Desde un panel compartido no podrá establecer un enlace a los siguientes elementos:

Compartir panel

Fig. 1: Compartir un panel en la administración de paneles

Fig. 2: Compartir un panel en el editor de paneles


  1. En la fila de un panel, haga clic en la administración de paneles (Fig. 1)o, en la barra de herramientas del editor de paneles (Fig. 2), haga clic en el icono Compartir panel.
  2. En la ventana Compartir panel públicamente, seleccione la opción "(Nombre del panel)" compartido públicamente .
  3. Copie el enlace mostrado debajo para compartirlo y haga clic en Confermare. El enlace es estático y no cambia si se revoca y se vuelve a conceder el uso compartido.
  4. En la columna Uso compartido aparece una marca de verificación. El panel se comparte.


Mostrar un panel compartido

A través de un enlace de panel compartido podrá mostrar un panel en el modo de presentación sin iniciar sesión en GridVis.

PosiciónDescripción
1

Cambia el ajuste de hora. Usted puede cambiar los ajustes de la hora indicada durante la presentación del panel. Este cambio es válido para todos los objetos del panel durante la presentación. En los ajustes de objeto podrá exceptuar objetos individuales de un cambio de la hora indicada.

2

Muestra el panel en el modo de pantalla completa.

3

Adapta el panel al tamaño de ventana, de modo que llene completamente el área de visualización.

4

Conmuta el modo panning. El símbolo del ratón indica que usted interactúa con los objetos en el panel. El símbolo de la mano significa que usted navega en el modo de presentación.