
| Sv translation | ||
|---|---|---|
| ||
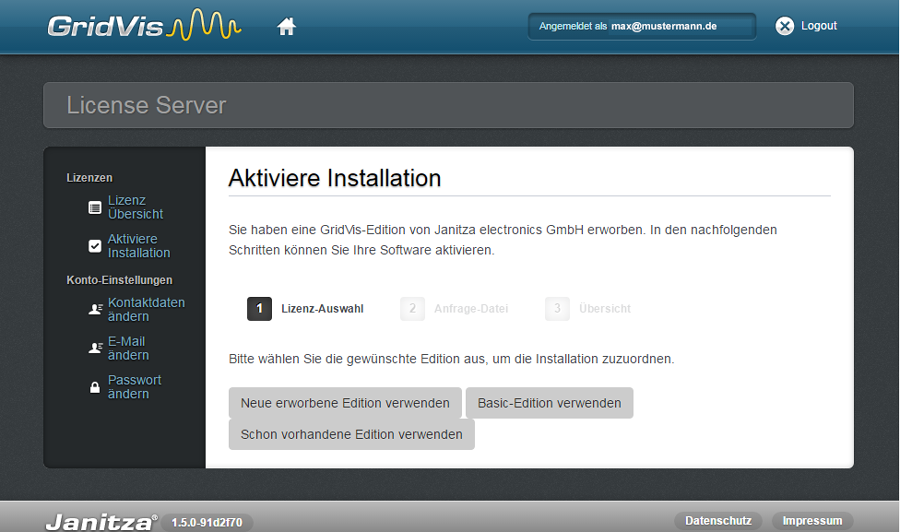
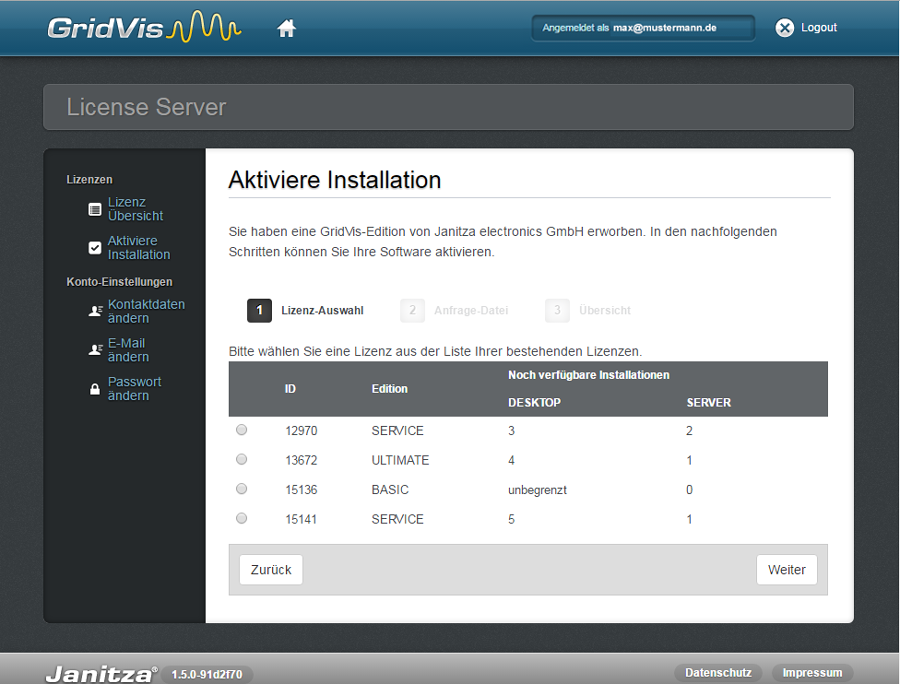
Voraussetzung für die Installation einer vorhandenen GridVisGridVis®-Edition sind " noch verfügbare Installationen " Ihrer erworbenen GridVisGridVis®-Edition. Gehen Sie wie folgt vor: Schritt 1: Lizenz-Auswahl
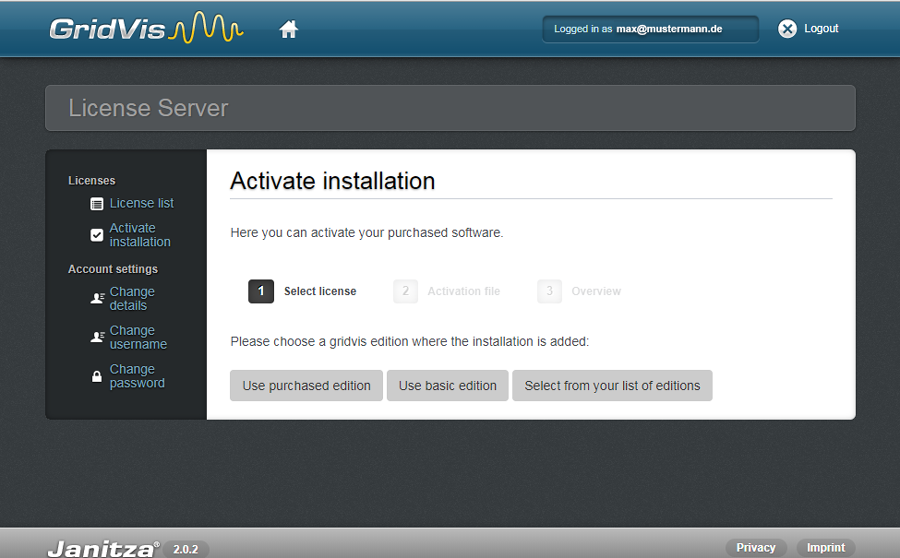
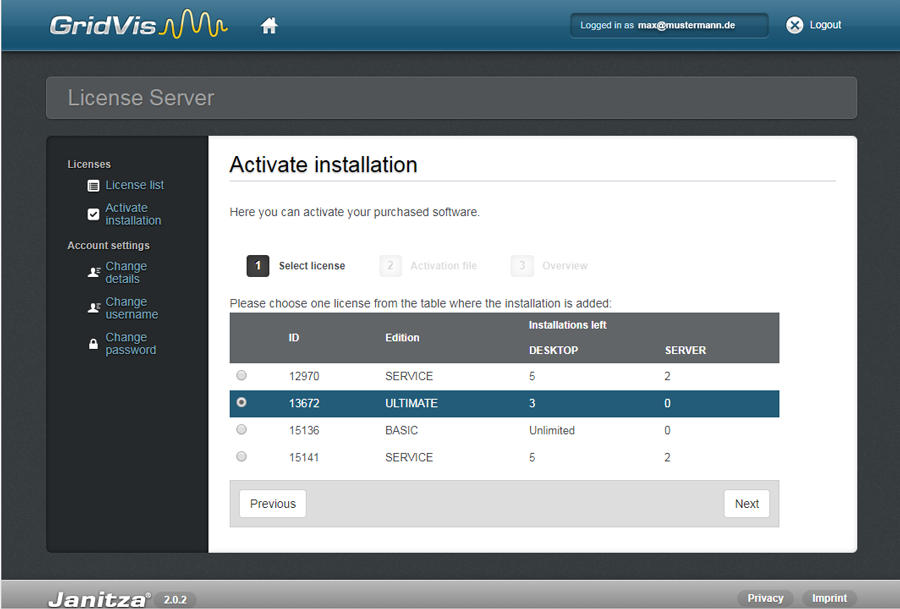
Schritt 1: Lizenz-Auswahl
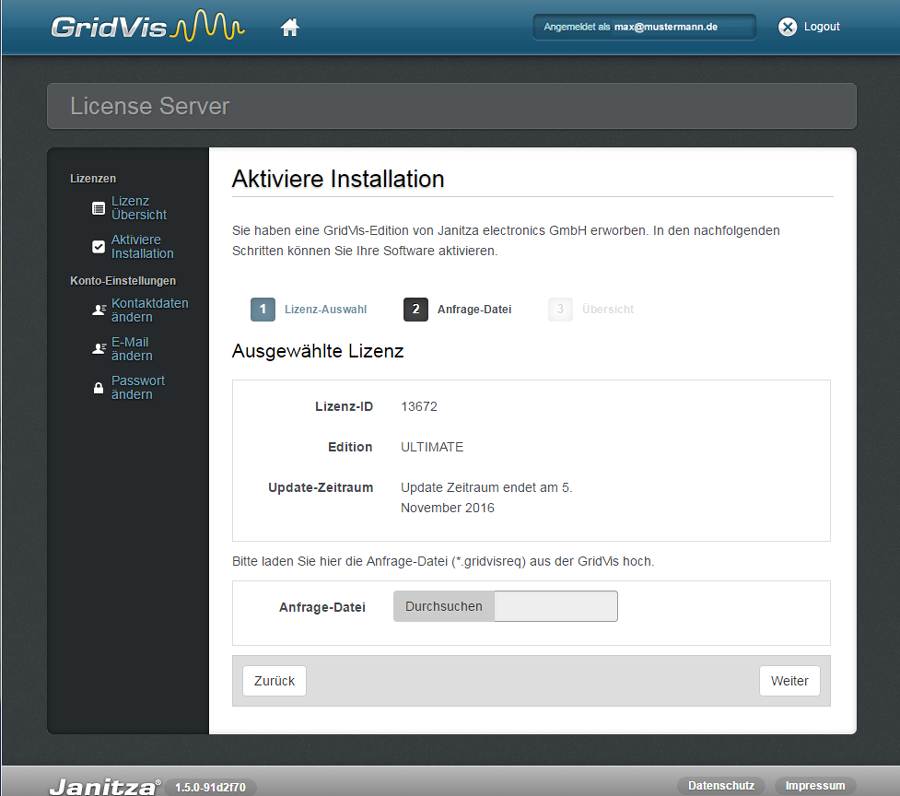
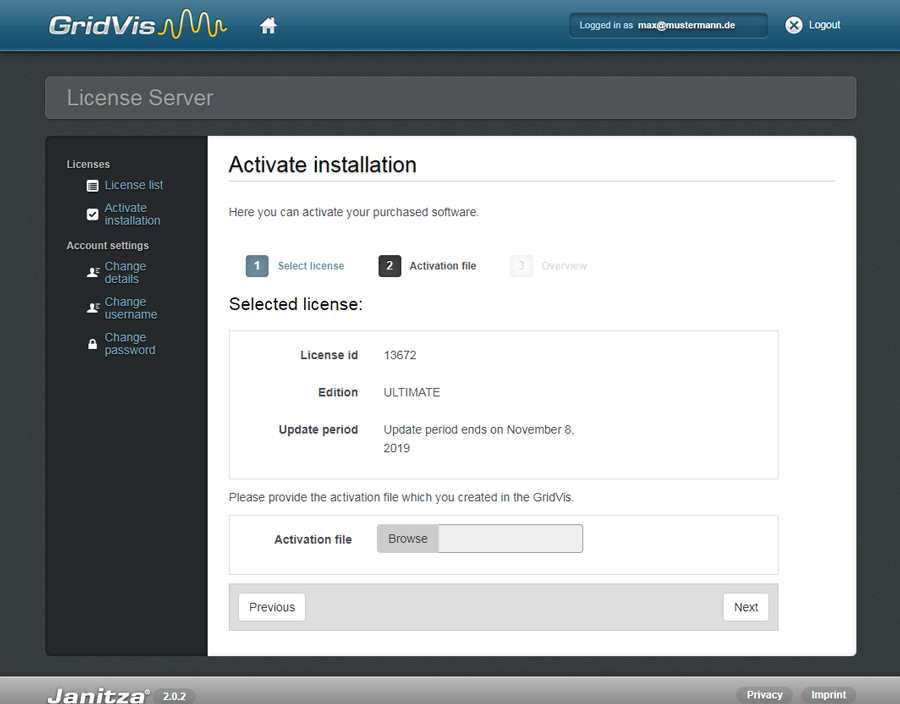
Schritt 2: Anfrage-Datei
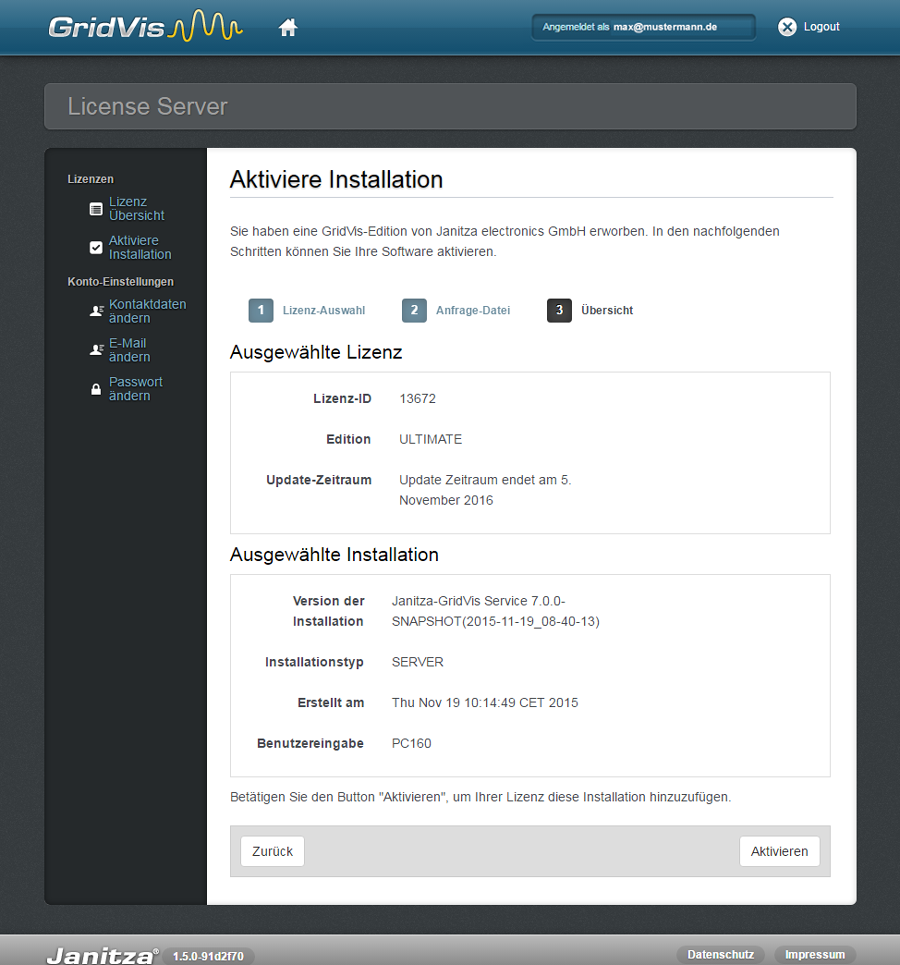
Schritt 3: Übersicht
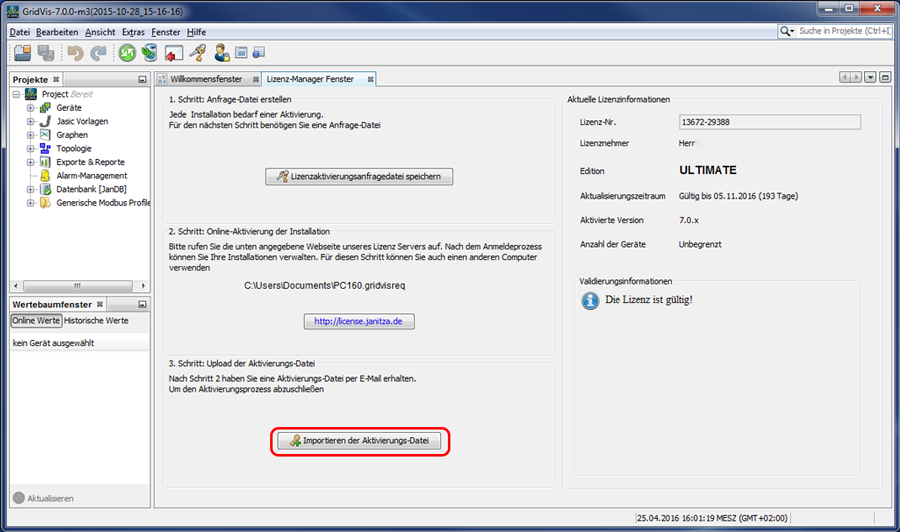
GridVisGridVis®-Desktop: Fenster " Lizenz-Manager"
|
| Sv translation | ||||
|---|---|---|---|---|
| ||||
El requisito para instalar una edición GridVis GridVis® existente consiste en contar con «instalaciones instalaciones aún disponibles» disponibles para la edición GridVis GridVis® que usted adquirió. Proceda de la siguiente manera: Paso 1: selección de la licencia
Paso 1: selección de la licencia
Paso 2: archivo de solicitud
Paso 3: Vista general
GridVis GridVis® Desktop: ventana «Administrador Administrador de licencias»licencias
|


| Sv translation | ||
|---|---|---|
| ||
"Still available installations " of your purchased GridVis GridVis® edition are a prerequisite for the installation of an existing GridVis GridVis® edition. Proceed as follows: Step 1: License Selection
Step 1: License Selection
Step 2: Request File
Step 3: Overview
GridVis GridVis® Desktop: Window " License Manager"
|